

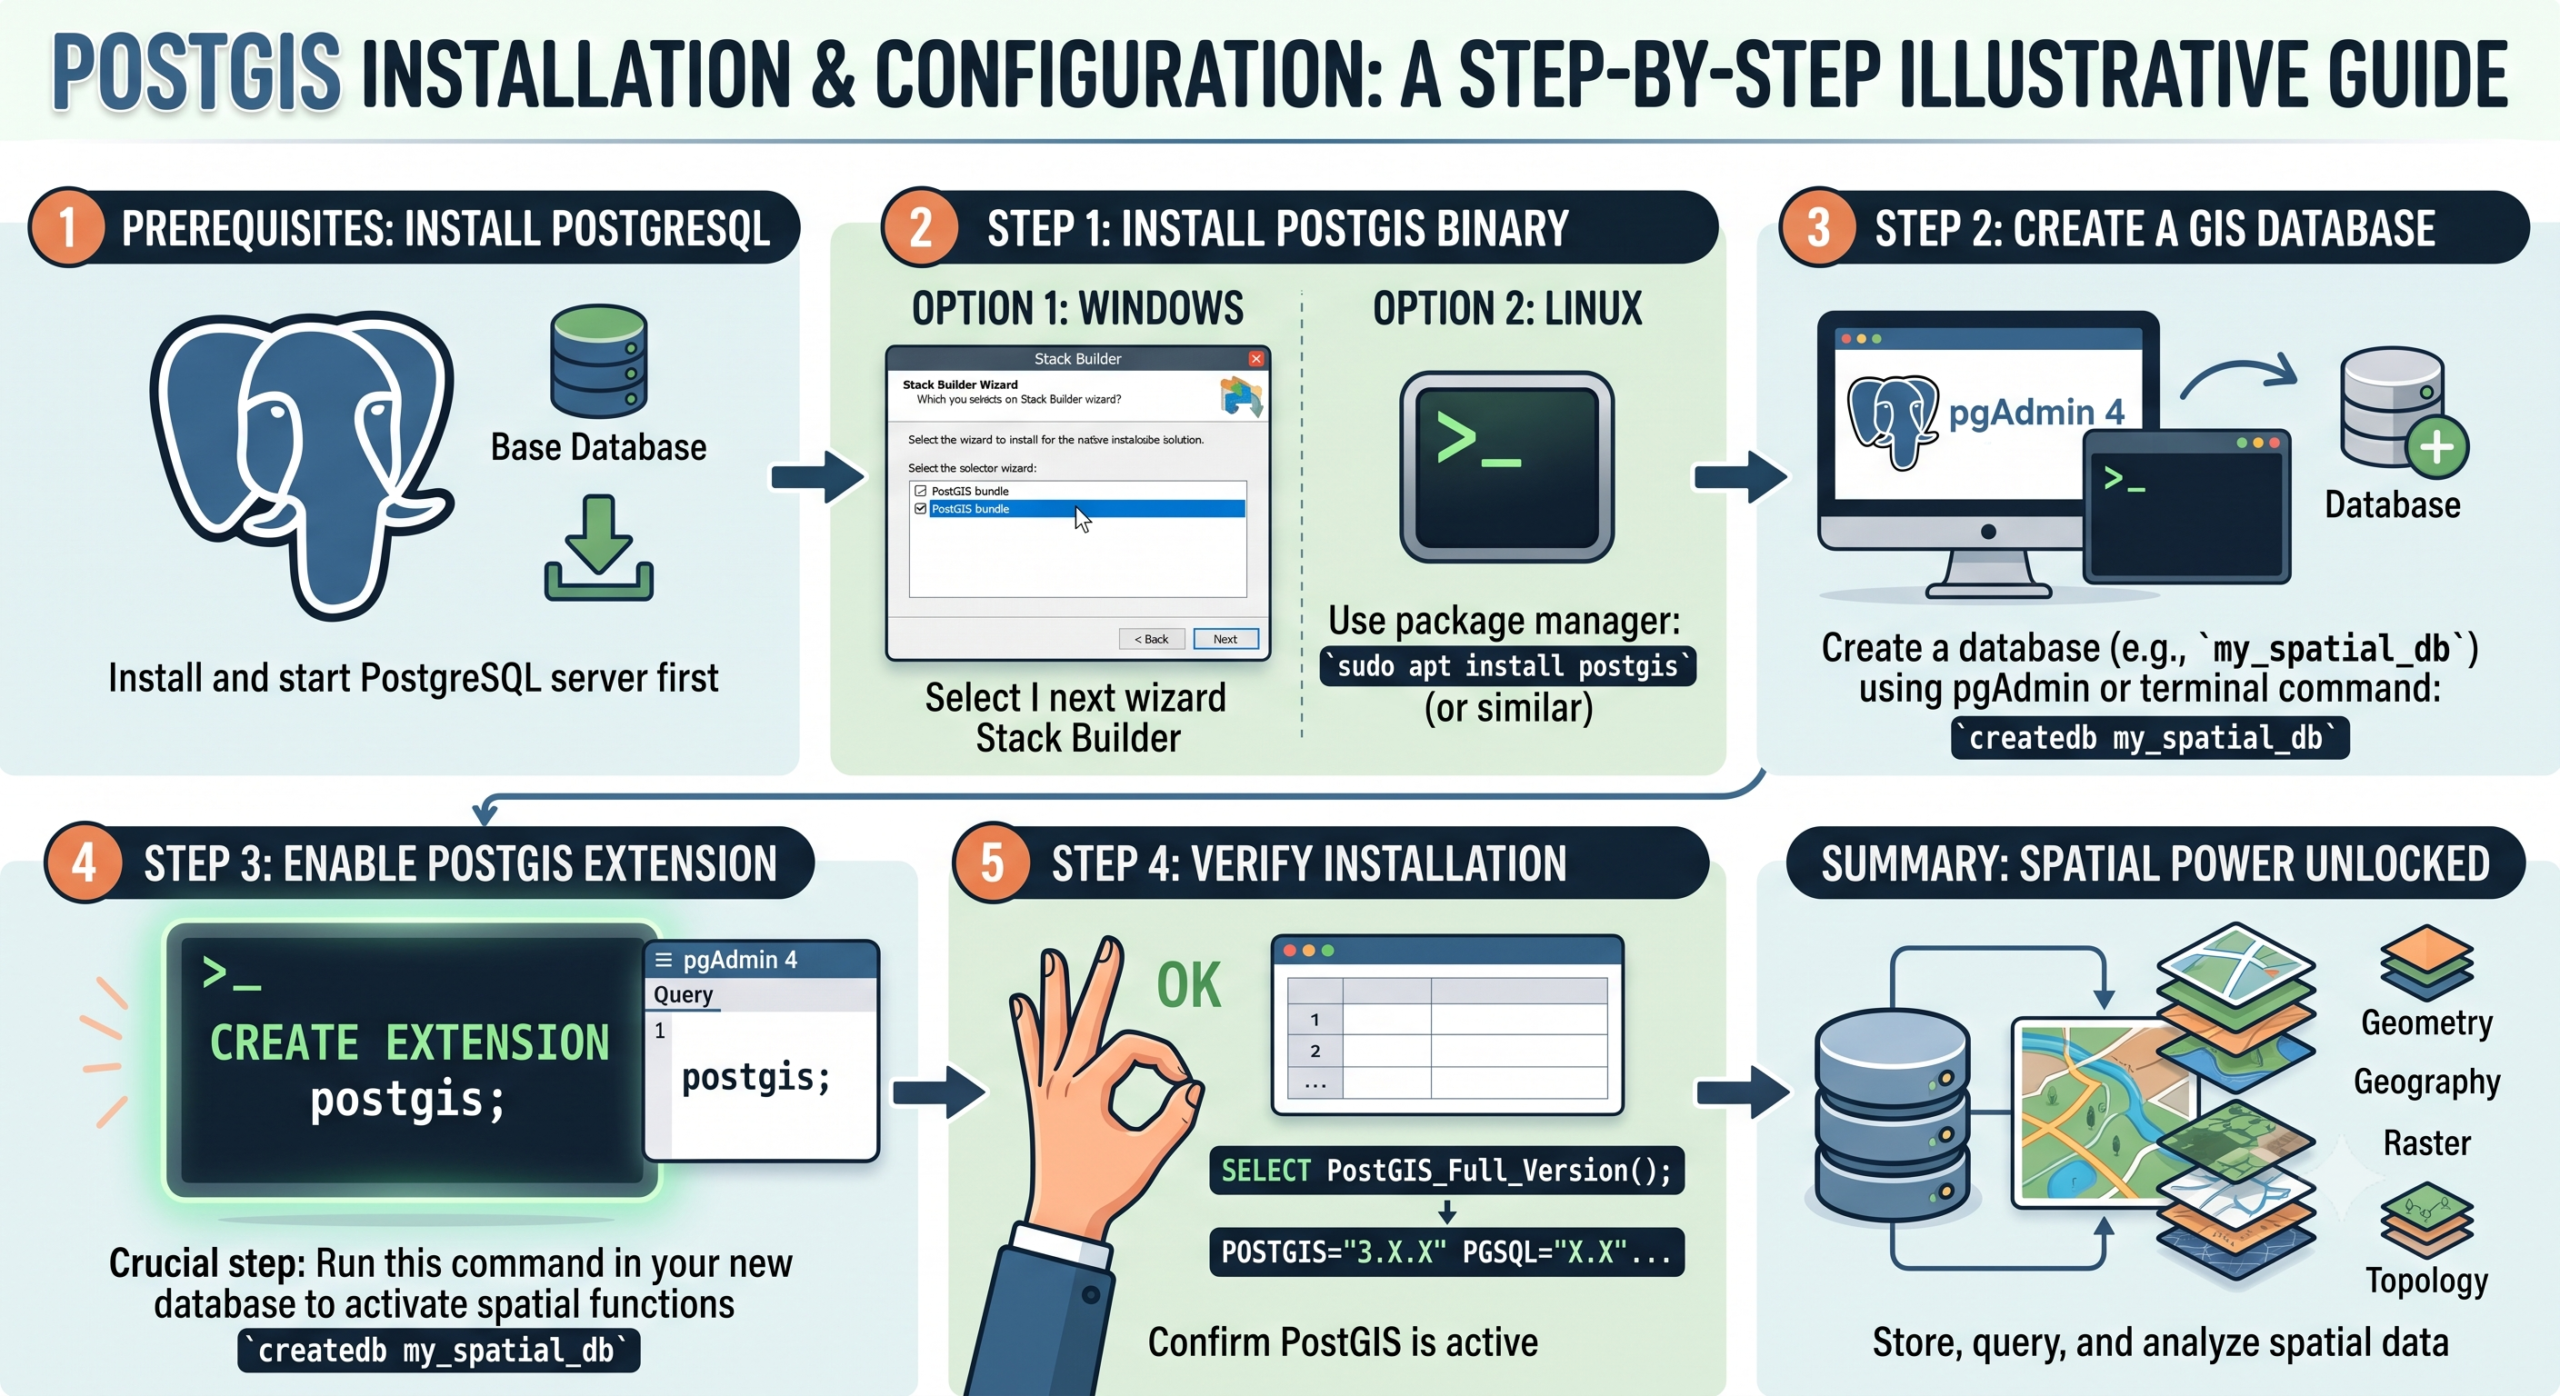
PostGIS isn’t a separate database — it’s a spatial extension that turns an ordinary PostgreSQL database into one that understands geometry, coordinate systems, and spatial queries natively. That distinction matters for this walkthrough: you’ll always be installing PostgreSQL first, then adding PostGIS on top, not installing «PostGIS» as a standalone product.
As of early 2026, the current stable release is PostGIS 3.6, supporting PostgreSQL versions 14 through 18. This guide covers installation on Windows, macOS, and Linux, plus the fastest option for testing — Docker — followed by the configuration steps every new install actually needs.
Before You Start: Pick Your PostgreSQL Version
Unless you have a specific reason to run an older version (a legacy application requirement, for instance), install the latest stable PostgreSQL release your platform’s installer offers — PostgreSQL 17 or 18 as of this writing — since PostGIS releases new minor versions to track PostgreSQL’s own annual release cycle, and running current versions of both avoids the compatibility gaps that show up when one lags far behind the other.
Option 1: Windows
- Download the PostgreSQL installer from EnterpriseDB (the official Windows distribution channel).
- Run the installer and complete the standard PostgreSQL setup, noting the password you set for the
postgressuperuser — you’ll need it constantly. - At the end of installation, launch Stack Builder, which the installer offers to open automatically.
- In Stack Builder, select your PostgreSQL installation, then navigate to Spatial Extensions and choose the latest PostGIS bundle for your PostgreSQL version.
- Complete the PostGIS installer — it will prompt you to optionally create a spatial database immediately, which you can accept or skip and do manually later.
This Stack Builder path is the officially documented and most reliable route on Windows; avoid mixing binaries from unofficial sources, since PostGIS’s native libraries (GEOS, PROJ, GDAL) need to match versions precisely.
Option 2: macOS
Two good paths, depending on how much control you want:
Postgres.app (simplest): Download Postgres.app, which bundles PostgreSQL with PostGIS pre-installed and version-matched — currently shipping PostGIS 3.6.x paired with PostgreSQL 18, with older PostgreSQL/PostGIS version pairs also available in the same release if you need to match an existing project. Drag it to Applications, launch it, and it starts a running PostgreSQL server immediately with PostGIS ready to enable per-database.
Homebrew (more control):
bash
brew install postgresql@17
brew install postgis
brew services start postgresql@17
Homebrew installs PostGIS as a set of extension files linked against your Homebrew PostgreSQL install; verify the versions are compatible before proceeding if you’re pinning specific package versions.
Option 3: Linux (Debian/Ubuntu)
bash
# Add the PostgreSQL apt repository for the latest packages
sudo apt update
sudo apt install postgresql postgresql-contrib

# Install the PostGIS package matching your PostgreSQL version
sudo apt install postgis postgresql-17-postgis-3
Replace 17 with your installed PostgreSQL major version — Ubuntu/Debian package names are version-specific, so check psql --version first if you’re unsure which package to install.
Option 4: Linux (RHEL/CentOS/Fedora)
bash
sudo dnf install postgresql-server postgresql-contrib
sudo postgresql-setup --initdb
sudo systemctl enable --now postgresql
sudo dnf install postgis34_17
Package naming on RHEL-family distributions varies by PostGIS/PostgreSQL version combination — check the PostGIS Yum repository documentation for the exact package name matching your installed PostgreSQL version.
Option 5: Docker (Fastest for Testing and Development)
If you just want a working PostGIS instance without touching your host system at all — ideal for testing a workflow before committing to a production install — the official image handles everything in one command:
bash
docker run --name postgis-dev \
  -e POSTGRES_PASSWORD=yourpassword \
  -p 5432:5432 \
  -d postgis/postgis:17-3.5
This pulls a PostgreSQL 17 image with PostGIS 3.5 pre-installed and exposes it on the default port. Swap the tag for whichever PostgreSQL/PostGIS version pair you need — the official postgis/postgis image publishes tags for both 3.5.x and 3.6.x lines across PostgreSQL 14 through 18. This is the recommended path for spinning up a disposable environment to follow the rest of this tutorial without any risk to an existing system.
Step 1: Create a Spatial Database
Regardless of platform, the actual PostGIS activation happens the same way. Connect to PostgreSQL:
bash
psql -U postgresCreate a dedicated database for your spatial project rather than enabling PostGIS on an existing general-purpose database:
sql
CREATE DATABASE geospatial_project;
\c geospatial_project
Step 2: Enable the PostGIS Extension
Inside that database, enable PostGIS:
sql
CREATE EXTENSION postgis;If your workflow needs topology support (common for cadastral or network-topology work) or raster support, add those extensions too:
sql
CREATE EXTENSION postgis_topology;
CREATE EXTENSION postgis_raster;
Step 3: Verify the Installation
Confirm PostGIS is active and check the version, along with the underlying GEOS, PROJ, and GDAL library versions it’s linked against — useful information when debugging compatibility issues later:
sql
SELECT PostGIS_Full_Version();You should see output listing the PostGIS version alongside its dependency versions. If this query fails, PostGIS isn’t correctly installed for this PostgreSQL version — the most common cause is a version mismatch between the PostGIS package and your installed PostgreSQL major version.
Step 4: Create Your First Spatial Table and Query
Create a table with a geometry column, specifying the coordinate system by its EPSG code — 4326 (WGS 84, standard latitude/longitude) is the usual default for general-purpose data:
sql
CREATE TABLE survey_points (
    id SERIAL PRIMARY KEY,
    name VARCHAR(100),
    geom GEOMETRY(Point, 4326)
);

INSERT INTO survey_points (name, geom)
VALUES ('Benchmark A', ST_SetSRID(ST_MakePoint(2.1734, 41.3851), 4326));
Run a basic spatial query — calculating the distance in meters between two points requires projecting to a metric coordinate system first, since EPSG:4326 is in degrees, not meters:
sql
SELECT ST_Distance(
    ST_Transform(geom, 25831),
    ST_Transform(ST_SetSRID(ST_MakePoint(2.1500, 41.3900), 4326), 25831)
) AS distance_meters
FROM survey_points
WHERE name = 'Benchmark A';
If that returns a sensible distance value, your installation is fully functional.
Step 5: Connect QGIS to Your PostGIS Database
Once PostGIS is running, the most common next step is connecting a desktop GIS client. In QGIS: Layer → Add Layer → Add PostGIS Layers, then create a new connection with your host, port, database name, and credentials. This lets you browse, edit, and style your PostGIS tables directly from QGIS’s interface — the combination covered in more depth in our QGIS vs ArcGIS Pro comparison.
Common Pitfalls to Check First
- Version mismatch between PostgreSQL and PostGIS. This is the single most common installation failure — always install the PostGIS package built specifically for your installed PostgreSQL major version, not just «the latest PostGIS.»
- Forgetting
CREATE EXTENSION postgisruns per-database, not server-wide. Each new database you create needs the extension enabled again unless you set it up in a template database. - SRID confusion. Always explicitly set your SRID with
ST_SetSRID, and confirm which EPSG code your source data actually uses — silently mixing 4326 (degrees) and a projected metric system in the same calculation produces wrong distances without any error message. - Upgrading PostgreSQL major versions. A PostgreSQL major-version upgrade generally requires a
pg_dump/pg_restorecycle for databases containing PostGIS data, rather than an in-place upgrade — plan for this explicitly rather than discovering it mid-upgrade. - Permissions. If a non-superuser role needs to create PostGIS-enabled databases or extensions, make sure that role has the necessary privileges granted — a frequent point of confusion on shared or managed database servers.
Final Verdict
PostGIS installation is genuinely a five-minute task once you know the two things that actually determine success: matching your PostGIS package to your PostgreSQL major version, and remembering the extension activates per-database. Everything past that — topology support, raster support, QGIS connectivity — is additive on top of that same base setup. For quick testing or evaluation, skip the platform-specific installers entirely and start with the Docker image; it’s the fastest way to get a working, disposable PostGIS instance running the exact version pair you need.
Once your PostGIS instance is running, our guide on QGIS vs ArcGIS Pro covers how each desktop GIS client handles a PostGIS connection differently — worth reading before you standardize your team’s workflow around one client.